TM 9-2320-365-20-4
16-57. M1079 BLACKOUT SWITCH REPLACEMENT
This task covers:
a. Removal
b. Installation
c. Follow-On Maintenance
INITIAL SETUP
Equipment Conditions
AC power disconnected (TM 9-2320-365-10).
Batteries disconnected (para 7-48).
Tools and Special Tools
Tool Kit, Genl Mech (Item 44, Appendix C)
Materials/Parts
Dispenser, Pressure Sensitive Adhesive Tape
(Item 21, Appendix D)
Lockwasher (2) (Item 77, Appendix G)
Dispenser, Pressure Sensitive Adhesive
Lockwasher (2) (Item 79, Appendix G)
Strain Relief (Item 263, Appendix G)
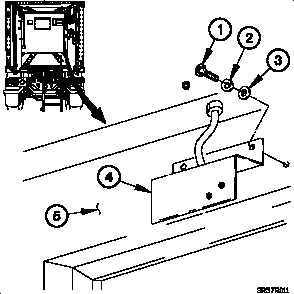
a. Removal.
NOTE
All blackout switches are removed the same
way. Right rear blackout switch S11 shown.
(1) Remove two screws (1), lockwashers (2), washers (3),
and bracket (4) from van body wall (5).
Discard
lockwashers.
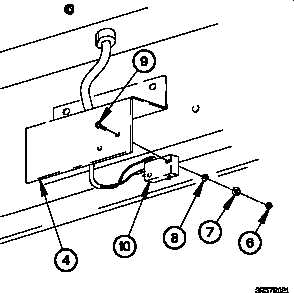
(2) Remove two nuts (6), lockwashers (7), washers (8),
screws (9), and blackout switch (10) from bracket (4).
16-369