TM 9-2320-365-20-3
11-4. FRONT BRAKE PLUNGER ASSEMBLY REPLACEMENT/REPAIR (CONT)
NOTE
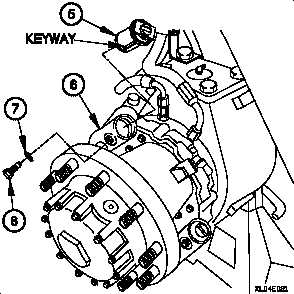
Align keyway in adjusting plunger with
hole in plunger housing.
(5) Install adjusting plunger (5) in plunger housing (6).
CAUTION
• Ensure pawl enters adjusting plunger so that
adjusting plunger slides freely in plunger
housing.
Failure to comply may result in
damage to equipment.
• Ensure grooves on pawl engages grooves on
adjusting sleeve.
Failure to comply may
result in damage to equipment.
(6) Position lockwasher (7) and adjusting pawl assembly (8)
in plunger housing (6).
(7) Tighten adjusting pawl assembly (8) to 15-25 lb-ft (20-
34 N·m).
(8) Perform steps (5) through (7) on second adjusting
plunger assembly.
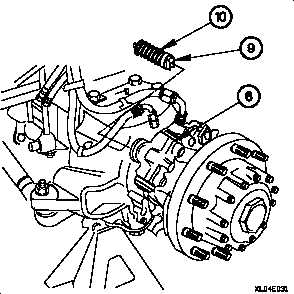
(9) Apply grease on wedge rollers (9).
CAUTION
Ensure wedge rollers are aligned with
slots in adjusting plungers. Firm pressure
is required to fully seat wedge in adjusting
plungers. Failure to fully seat wedge in
adjusting plungers may result in damage
to equipment.
(10) Install wedge (10) in plunger housing (6).
f. Follow-On Maintenance.
(1) Install front brake air chamber (para 11-7).
(2) Install front brake shoes (para 11-2).
End of Task.
11-22


